Mobile App Dev: Final!
We’re at the end of the semester–amazing. Here’s what you need to do for next week:
1) Build a hi-rez prototype of your application. It should be able to be demoed in a walkthrough that should show the general interaction a user can expect as well as highlight some of the unique capabilities/characteristics of the app.
2) Prepare a three-slide presentation that leads up to your walk-through that introduces:
a) the app, its name, and succinct concept
b) the intended audience for the app
c) the development process
3) In addition to covering those bases your FIVE MINUTE MAX presentation should also give a guided walkthrough of your app.
4) You will also be turning in an 700 word report that covers the following:
a) explains in detail the mobile strategy:
–what does it set out to accomplish?
–how does it engage users?
–what is the end goal?
b) Mentions things learned from the prototyping & testing process
c) Gives a narrative walkthrough of the prototype: be specific and include detail: who is the user? what are they trying to accomplish? what is the experience like?
Final Project Info!
So we’re going to extend the mobile strategy work that we’ve done for the last five weeks into apps of your own choosing.
The app needs to be rooted in communication/journalism. A “draw a funny face on your friend” app isn’t that. An app that builds an ad-hoc reporting team at an event it. It can be an app that publishes information, or one that collects it (or a combination of the two). It can be an app that interfaces and dialogues with a community. It can be an app that… you get the picture.
It also needs to be rooted in an audience and fills a real need for those people–not a perceived one.
The app needs to be conceived of and presented in a context–where do people use this, and why there?
The app needs to target a specific platform.
NEXT CLASS: PITCH (5 minutes max)
Your pitch will do a few things:
- Introduce the concept.
- Introduce the audience/community it is created for
- Give a basic sense of how it works.
- Give the context that people will use it.
- Explain what platform you’re targeting and why.
A 300 word report should be turned in that covers these same areas.
FOLLOWING WEEK: PAPER PROTOTYPES
Test your paper prototypes with five people from your community over the week. Bring your refined prototype to class, we will test it with each other. Additionally, post 300 words on the testing process, with video documentation, to the class blog.
FINAL WEEK: HI-REZ WALKTHROUGH + PRESENTATION
Build out a hi-rez prototype of your application and demo it in a five-minute presentation. Presentation & report specifics will be outlined on the class blog.
Chicago Public Media: 9:45 am tomorrow!
Please meet just inside the front doors of Navy Pier NO LATER than 9:45 tomorrow. We will walk down the Pier to Chicago Public Media’s offices at that point.
Be ready to present, and see you there!
Hi-Rez prototypes: A couple things!
First, here’s a few links to some great graphics libraries with which to build from. Most of these are Photoshop files, but you may be able to open those in other graphics applications:
iPhone GUI one
iPhone GUI two
Android Gingerbread GUI: note, weird download format. Will need to also download a .rar file extractor.
Older Android GUI one
Older Android GUI two
iPad GUI
Palm Pre GUI
Finally, some tips regarding how to build your hi-rez prototype:
1) Every bit of information on display should feel “real” no words on top of a box that read “photo”, use an actual photo. Any bio information should be filled in in full, not simply say “bio info goes here.”
2) That feeling of reality extends to the prototype too–the more actual elements you can bring in from how the phone/mobile device you want to build works, the better. The graphics libraries linked up top are worth digging through.
3) You’re building these in a presentation program. Either Keynote or Microsoft Powerpoint are your best bets. If you’re a Mac User, Keynote is available as a free demo download from Apple, as part of the iWork suite (or the full version for $20 from the Mac App Store). If you’re a PC user, the chances that you don’t already have Powerpoint as part of Microsoft office is very very slim. But if you don’t, I believe it also is available as a download. WARNING: These are enormous downloads.
4) The key skill is understanding how to link from a button (i.e. any graphic element that you want to be a button) to another slide. Here’s a quick tutorial:
1) Select the thing that you want to make into a button.
2) In Keynote, go to the inspector (the little blue “i” button that says “inspector” below it) and then click on the Hyperlinks icon (the blue arrow). It will open a window that looks like this:

Configure your similarly: link to a slide, enter the slide number you want to link to. Done.
2b) In Powerpoint, when you’ve selected an object, the formatting palette changes. One of the options there is called “hyperlink”. On my version of Powerpoint (WARNING: Microsoft likes to change this a lot, so your version may be different), it looks like this:

Not as flashy, but it does the same thing. When you choose “slide” it pops up a dialogue box to chose your slide.
3) That’s about it. Just keep doing this for all your options. Remember that you can copy/paste linkages so it makes sense to build your base-level links first (things that will appear on every page) before you start so you can just copy & paste that stuff on each page instead of redrawing/linking.
Good luck!
Dan
Group Collaboration Tools
the google suite
Google Docs
Google Calendar
Google Sites
collaboration-focused tools
Basecamp (note the tiny type offering a free account)
toss slides between team members
Slideshare
Presentations & Prototypes for next week!
For next week you need to do further testing on paper prototypes until they work “right.” Then build a hi-rez prototype that adds more detail and interactive functionality. This can be done using the tool of your choice.
In addition, you will need to propose a larger mobile strategy and talk about how your prototype fits into that larger strategy.
You will be giving a walkthrough of this prototype as part of a larger presentation next week. That presentation also entails:
at least two slides introducing your mobile strategy and explaining the prototype’s role in it. Slides work better without too much text!
a five minute presentation that:
1) explains the mobile strategy clearly and succinctly.
2) talks a bit about the insights that lead to this strategy.
3) introduces the hi-rez prototype, in a walkthrough.
In addition to this presentation, you will also turn in, both to the CPM folks and to me, a written report, of around 800 words that:
1) explains in detail the mobile strategy:
–what does it set out to accomplish?
–how does it engage users?
–what is the end goal?
2) steps through the process for arriving at this idea: what were the insights that you gained from observations? How did they drive the development?
3) Mentions things learned from the prototyping & testing process
4) Gives a narrative walkthrough of the prototype: be specific and include detail: who is the user? what are they trying to accomplish? what is the experience like?
**LOCATION AND TIME FOR OUR PRESENTATIONS WILL BE POSTED TO THIS BLOG ONCE IT IS CONFIRMED WITH CHICAGO PUBLIC MEDIA***
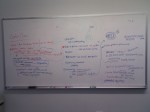
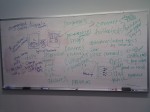
Boards from this week!
Here are the boards you guys brainstormed this week. Click on an image to get a larger pic.
Paper Prototyping assignment FOR NEXT WEEK
So this week you’re going to be building paper prototypes of your idea (as individuals, NOT as a group). You need to test that prototype at least TWICE with a real user of your application.
This test should help you to refine your prototype and force you to fill in gaps in the UI and the workflow. Between your tests and bringing your prototype in next week, you should refine it based on the feedback your got from your tests. Here’s what else needs to happen:
You need to test your paper prototypes at least twice. Make refinements between the testing process (and during!). Document these testing sessions:
300 words on the testing and the idea:
What did you set out to test (i.e. what is your thing?)
What did each test reveal?
What did you change after each test?
Photo documentation (upload to Flickr) or EVEN BETTER: video, uploaded to YouTube.
Include links to your documentation and the report itself in the comments of this post.
And bring in your paper prototype for further testing in class next week.
Paper Prototyping Readings
be sure to read these BEFORE undertaking your paper prototype this week
PAPER PROTOTYPING
A great overview of paper prototyping
Why low-fi prototyping kicks ass
A shorthand for designing UI flows
Paper Prototyping Examples
iPhone workflow:
Nice mobile test with scenarios:
This is just simply awesome:
 More Mobile Journalism News
- An error has occurred; the feed is probably down. Try again later.
